How Can We Help?
- HOW DO I UPDATE TO THE LATEST VERSION?
- HOW DO I UPGRADE FROM GROUNDSKEEPER LITE OR BLIZZARD BUSTER TO GROUNDSKEEPER PRO?
- HOW TO CHARGE A CUSTOMER FOR SERVICES AND THEN PRINT AN INVOICE / BILL
- HOW TO GET A LOGO ON THE INVOICES / BILLS
- HOW TO WORK WITH SERVICES THAT ARE PART OF A CONTRACT WITH PERIODIC PAYMENTS
- INVOICES / BILLS ARE MISSING INFORMATION
- WINDOWS 10 PRINTING PROBLEMS - NOTHING PRINTS
- 70 PERMISSION DENIED / RUN-TIME ERROR 3051 - THE MICROSOFT JET DATABASE ENGINE CANNOT OPEN THE FILE. IT IS ALREADY OPENED EXCLUSIVELY BY ANOTHER USER, OR YOU NEED PERMISSION TO VIEW IT'S DATA.
- ADKAD PDF
- BUTTONS MISSING/UNREADABLE AND SCREENS BEYOND VIEWABLE AREA OF MONITOR
- COMPONENT 'OCX/DLL' OR ONE OF ITS DEPENDENCIES NOT CORRECTLY REGISTERED: A FILE IS MISSING OR INVALID
- CONFIGURE EMAIL
- ELECTRONIC PAYMENTS
- ERROR 1304 - ERROR WRITING/READING TO FILE. VERIFY THAT YOU HAVE ACCESS TO THAT DIRECTORY.
- ERROR 76: PATH NOT FOUND - EXPORTING A ROUTE TO A CSV FILE Show all articles ( 31 )
- 70 PERMISSION DENIED / RUN-TIME ERROR 3051 - THE MICROSOFT JET DATABASE ENGINE CANNOT OPEN THE FILE. IT IS ALREADY OPENED EXCLUSIVELY BY ANOTHER USER, OR YOU NEED PERMISSION TO VIEW IT'S DATA.
- BUTTONS MISSING/UNREADABLE AND SCREENS BEYOND VIEWABLE AREA OF MONITOR
- COMPONENT 'OCX/DLL' OR ONE OF ITS DEPENDENCIES NOT CORRECTLY REGISTERED: A FILE IS MISSING OR INVALID
- ERROR 1304 - ERROR WRITING/READING TO FILE. VERIFY THAT YOU HAVE ACCESS TO THAT DIRECTORY.
- GETTING UP & RUNNING - INSTALLING ON A NEW OR ADDITIONAL COMPUTER OR RECOVERING FROM A VIRUS OR CRASH
- GROUNDSKEEPER LITE UPDATES - NEW FEATURES & BUG FIXES
- HOW DO I UPDATE TO THE LATEST VERSION?
- HOW DO I UPGRADE FROM GROUNDSKEEPER LITE OR BLIZZARD BUSTER TO GROUNDSKEEPER PRO? Show all articles ( 20 )
- 70 PERMISSION DENIED / RUN-TIME ERROR 3051 - THE MICROSOFT JET DATABASE ENGINE CANNOT OPEN THE FILE. IT IS ALREADY OPENED EXCLUSIVELY BY ANOTHER USER, OR YOU NEED PERMISSION TO VIEW IT'S DATA.
- BLIZZARD BUSTER UPDATES - NEW FEATURES & BUG FIXES
- BUTTONS MISSING/UNREADABLE AND SCREENS BEYOND VIEWABLE AREA OF MONITOR
- COMPONENT 'OCX/DLL' OR ONE OF ITS DEPENDENCIES NOT CORRECTLY REGISTERED: A FILE IS MISSING OR INVALID
- ERROR 1304 - ERROR WRITING/READING TO FILE. VERIFY THAT YOU HAVE ACCESS TO THAT DIRECTORY.
- GETTING UP & RUNNING - INSTALLING ON A NEW OR ADDITIONAL COMPUTER OR RECOVERING FROM A VIRUS OR CRASH
- HOW DO I UPDATE TO THE LATEST VERSION?
- HOW DO I UPGRADE FROM GROUNDSKEEPER LITE OR BLIZZARD BUSTER TO GROUNDSKEEPER PRO? Show all articles ( 20 )
- ADKAD PDF
- COMPONENT 'OCX/DLL' OR ONE OF ITS DEPENDENCIES NOT CORRECTLY REGISTERED: A FILE IS MISSING OR INVALID
- ERROR 1304 - ERROR WRITING/READING TO FILE. VERIFY THAT YOU HAVE ACCESS TO THAT DIRECTORY.
- GETTING UP & RUNNING - INSTALLING ON A NEW OR ADDITIONAL COMPUTER OR RECOVERING FROM A VIRUS OR CRASH
- HOW DO I UPDATE TO THE LATEST VERSION?
- INSTALL GROUNDSKEEPER PRO FROM CD
- RUNTIME ERROR 429: ACTIVEX COMPONENT CAN'T CREATE OBJECT
- 70 PERMISSION DENIED / RUN-TIME ERROR 3051 - THE MICROSOFT JET DATABASE ENGINE CANNOT OPEN THE FILE. IT IS ALREADY OPENED EXCLUSIVELY BY ANOTHER USER, OR YOU NEED PERMISSION TO VIEW IT'S DATA.
- ADKAD PDF
- BUTTONS MISSING/UNREADABLE AND SCREENS BEYOND VIEWABLE AREA OF MONITOR
- COMPONENT 'OCX/DLL' OR ONE OF ITS DEPENDENCIES NOT CORRECTLY REGISTERED: A FILE IS MISSING OR INVALID
- ERROR 1304 - ERROR WRITING/READING TO FILE. VERIFY THAT YOU HAVE ACCESS TO THAT DIRECTORY.
- ERROR 76: PATH NOT FOUND - EXPORTING A ROUTE TO A CSV FILE
- INVALID REGISTRATION NUMBER
- ISSUE WITH PRINTING - "THERE ARE NO DOCUMENTS AVAILABLE TO PREVIEW" Show all articles ( 12 )
HOW TO GET A LOGO ON THE INVOICES / BILLS
STEP 1:
CREATE THE LOGO IMAGE FILE.
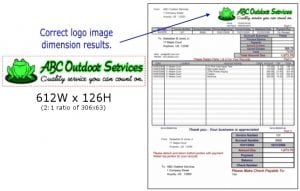
You will need your logo image to be a BITMAP file with the pixel dimensions of 306Wx63H. To create a sharper logo image, the size of the bitmap image can be a ratio of the required size. For example: a ratio of 2:1 would make the image dimensions 612Wx126H (see Image below).
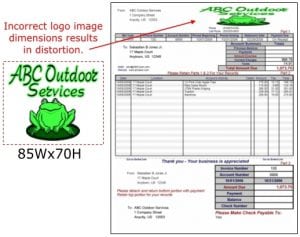
If the bitmap image does not meet the specifications for width and height, then the image will be automatically shrunk down or blown-up by the software to meet the specifications, thus, distorting the image (see Image below).
If you already have a logo and you want to edit it yourself:
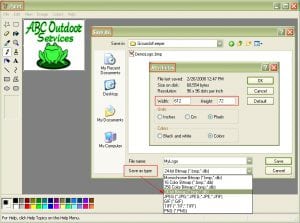
Odds are even if you already have a logo, it will need to be modified to meet the size and type specifications required by the software. Use any imaging software such as Microsoft’s Paint (see Image 1) to modify your image and save it as the correct bitmap file type. If your logo is small you can make a bitmap image with the correct dimensions and fill the unused section of the image with white. Anything with a white color in the created logo image will print transparent. The software comes with an example logo bitmap (demologo.bmp) that you may use as a template to create your own.
If you already have a logo and you want to have us edit your image:
We provide the service of taking your own logo image and modifying it to meet the size and type specifications required by our software.
Create a Logo from our website:
Or, you may create and purchase a stock logo from our website.
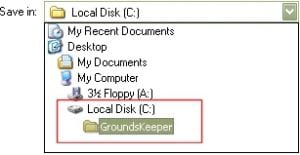
Finally, after your logo image file is created, SAVE it to your products folder on your harddrive (see Image 3).
STEP 2:
TELL THE SOFTWARE WHERE TO LOCATE YOUR LOGO IMAGE.
OPEN the PRINT BILLS screen of our software and on the top menu bar click on BILL OPTIONS|ADD/REMOVE COMPANY LOGO (see Image 4).
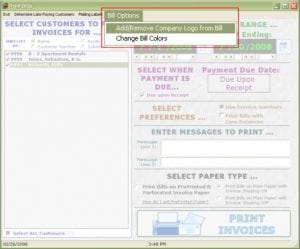
Select DISPLAY MY COMPANY LOGO and use the navigation boxes to point the software to the location of your logo file (see Image 5).
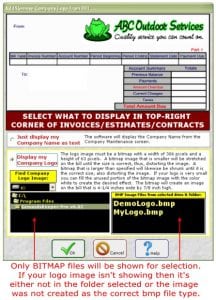
Only BITMAP files will be shown for selection. If your logo image isn’t showing then its either not in the folder selected or the image was not created as the correct BMP file type.
Do not point to a logo that is on removable storage like a CD, USB or floppy since the software will always need to be able to locate the logo in the location specified. Therefore, if the logo is on a CD and the CD is not in the drive, when the software prints your bills and looks for the image it will error out because it will not find it.
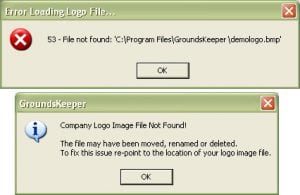
NOTE: If the software cannot locate your image file where specified you will get a ’52 – File not Found’ error (see Image 6). To fix this error simply re-point to the location of the bitmap image.
If you’re using the Pre-Printed Paper forms, they will come blank in the logo area. Your logo will be printed by your printer onto the Pre-Printed Paper.